

How To Create A Photo Album In Powerpoint 2016
Home > Articles > Home & Office Computing > Microsoft Applications
This chapter is from the book
Creating a Photo Album
If you have a bunch of pictures you want to pull together for a presentation, a quick way is to create a photo album. Unfortunately, the Photo Album feature is pretty old and doesn't give you a way to insert online pictures. Download pictures from your online storage or set up a synced folder on your hard drive so you can access all the images you want to include.
Create a Photo Album
Turn your pictures into a photo album, fast.
- Go to File, New and start a new presentation based on the Blank Presentation theme.
-
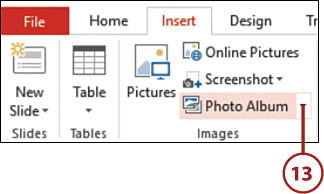
On the Insert tab, click Photo Album. This opens the Photo Album dialog box.
- Click the File/Disk button to insert pictures from your hard drive. Select pictures you want to include and click Insert to add them to the picture list. You can press Ctrl while clicking to select multiple individual pictures. To select a range of pictures, press Shift and click the first and last pictures in the range.
-
Click New Text Box to create a slide with a text box you can type in later. This is useful to create sections throughout your photo album.
- You can change the picture layout to multiple pictures or multiple pictures plus slide title. The default photo album uses a Fit to Slide Picture Layout, which fills each slide with a picture.
- When the pictures don't encompass the entire slide, you'll be able to change the Frame shape to apply settings such as rounded rectangles or soft edges. The preview thumbnail will give you an idea of what the slide will look like.
- Reorder or remove pictures using the buttons below the picture list. Be sure to check the box beside the pictures to make these tools available.
- Use the buttons below the picture preview to adjust brightness and contrast or rotate a picture.
- Turn on Captions below all pictures to automatically add the filename below each image.
- Choose a theme at the bottom of the dialog box if you want. You'll have a better selection of themes to choose from if you skip applying a theme here and do it afterward from the Design tab.
- After you're finished with all the settings and picture touch-ups, click Create to make your photo album!
-
Other steps to complete your photo album might include adding any necessary text, applying automatic transitions (Chapter 8, "Adding Animations and Transitions"), and setting the presentation to loop (Chapter 11, "Setting Up Your Slide Show").
- To add pictures to or otherwise edit your photo album later, go to the Insert tab and click the arrow next to the Photo Album button, and then choose Edit Photo Album.
How To Create A Photo Album In Powerpoint 2016
Source: https://www.informit.com/articles/article.aspx?p=2459343&seqNum=5#:~:text=Create%20a%20Photo%20Album,-Turn%20your%20pictures&text=On%20the%20Insert%20tab%2C%20click,the%20Photo%20Album%20dialog%20box.&text=Click%20the%20File%2FDisk%20button,them%20to%20the%20picture%20list.
Posted by: knighthattlem.blogspot.com
0 Response to "How To Create A Photo Album In Powerpoint 2016"
Post a Comment