

How To Create Virtual Machine On Azure
This browser is no longer supported.
Upgrade to Microsoft Edge to take advantage of the latest features, security updates, and technical support.
- Feedback
- Edit
Quickstart: Create a Linux virtual machine in the Azure portal
- Article
- 4 minutes to read
Thank you.
Applies to: ✔️ Linux VMs
Azure virtual machines (VMs) can be created through the Azure portal. The Azure portal is a browser-based user interface to create Azure resources. This quickstart shows you how to use the Azure portal to deploy a Linux virtual machine (VM) running Ubuntu 18.04 LTS. To see your VM in action, you also SSH to the VM and install the NGINX web server.
If you don't have an Azure subscription, create a free account before you begin.
Sign in to Azure
Sign in to the Azure portal if you haven't already.
Create virtual machine
-
Type virtual machines in the search.
-
Under Services, select Virtual machines.
-
In the Virtual machines page, select Add. The Create a virtual machine page opens.
-
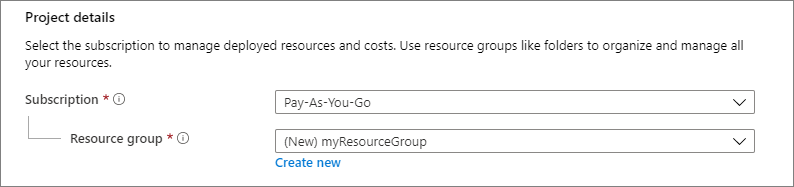
In the Basics tab, under Project details, make sure the correct subscription is selected and then choose to Create new resource group. Type myResourceGroup for the name.*.
-
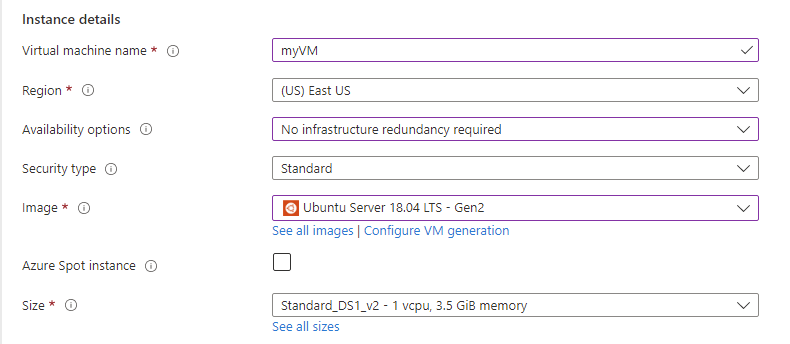
Under Instance details, type myVM for the Virtual machine name, choose East US for your Region, and choose Ubuntu 18.04 LTS for your Image. Leave the other defaults.
-
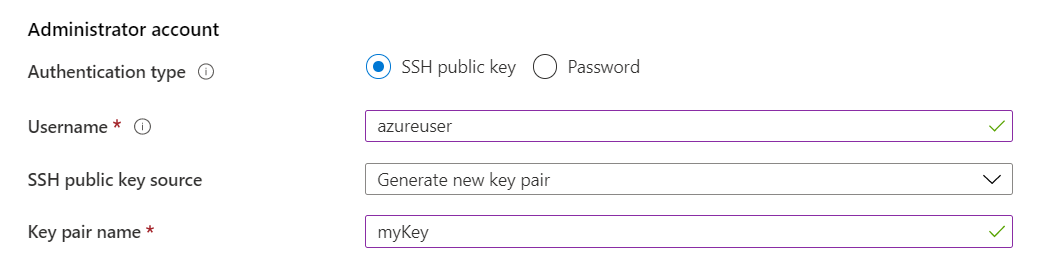
Under Administrator account, select SSH public key.
-
In Username type azureuser.
-
For SSH public key source, leave the default of Generate new key pair, and then type myKey for the Key pair name.
-
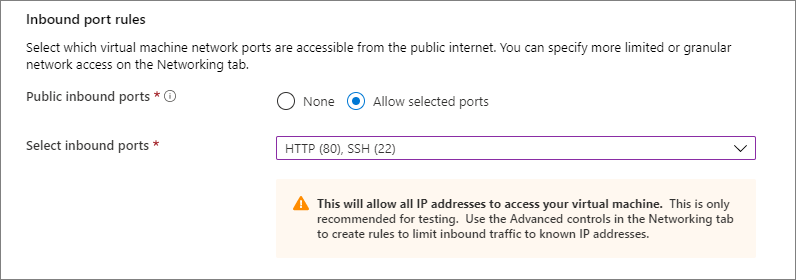
Under Inbound port rules > Public inbound ports, choose Allow selected ports and then select SSH (22) and HTTP (80) from the drop-down.
-
Leave the remaining defaults and then select the Review + create button at the bottom of the page.
-
On the Create a virtual machine page, you can see the details about the VM you are about to create. When you are ready, select Create.
-
When the Generate new key pair window opens, select Download private key and create resource. Your key file will be download as myKey.pem. Make sure you know where the
.pemfile was downloaded, you will need the path to it in the next step. -
When the deployment is finished, select Go to resource.
-
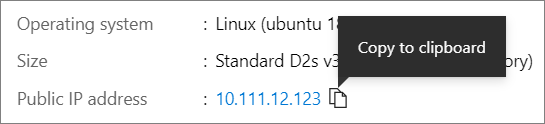
On the page for your new VM, select the public IP address and copy it to your clipboard.
Note
Azure provides an default outbound access IP for Azure Virtual Machines which aren't assigned a public IP address, or are in the backend pool of an internal Basic Azure Load Balancer. The default outbound access IP mechanism provides an outbound IP address that isn't configurable.
For more information about default outbound access, see Default outbound access in Azure
The default outbound access IP is disabled when a public IP address is assigned to the virtual machine, or the virtual machine is placed in the backend pool of a Standard Load Balancer with or without outbound rules. If a Azure Virtual Network NAT gateway resource is assigned to the subnet of the virtual machine, the default outbound access IP is disabled.
Virtual machines created by Virtual Machine Scale sets in Flexible Orchestration mode don't have default outbound access.
For more information about outbound connections in Azure, see Using Source Network Address Translation (SNAT) for outbound connections.
Connect to virtual machine
Create an SSH connection with the VM.
-
If you are on a Mac or Linux machine, open a Bash prompt. If you are on a Windows machine, open a PowerShell prompt.
-
At your prompt, open an SSH connection to your virtual machine. Replace the IP address with the one from your VM, and replace the path to the
.pemwith the path to where the key file was downloaded.
ssh -i .\Downloads\myKey1.pem azureuser@10.111.12.123 Tip
The SSH key you created can be used the next time your create a VM in Azure. Just select the Use a key stored in Azure for SSH public key source the next time you create a VM. You already have the private key on your computer, so you won't need to download anything.
Install web server
To see your VM in action, install the NGINX web server. From your SSH session, update your package sources and then install the latest NGINX package.
sudo apt-get -y update sudo apt-get -y install nginx When done, type exit to leave the SSH session.
View the web server in action
Use a web browser of your choice to view the default NGINX welcome page. Type the public IP address of the VM as the web address. The public IP address can be found on the VM overview page or as part of the SSH connection string you used earlier.

Clean up resources
When no longer needed, you can delete the resource group, virtual machine, and all related resources. To do so, select the resource group for the virtual machine, select Delete, then confirm the name of the resource group to delete.
Next steps
In this quickstart, you deployed a simple virtual machine, created a Network Security Group and rule, and installed a basic web server. To learn more about Azure virtual machines, continue to the tutorial for Linux VMs.
Feedback
How To Create Virtual Machine On Azure
Source: https://docs.microsoft.com/en-us/azure/virtual-machines/linux/quick-create-portal
Posted by: knighthattlem.blogspot.com
0 Response to "How To Create Virtual Machine On Azure"
Post a Comment